AutoCAD is a powerful drafting and design software used by professionals across various industries. One crucial aspect of creating high-quality drawings in AutoCAD is the ability to control the appearance of printed output using plot styles. In this article, we’ll guide you through how to add plot style in AutoCAD using CTB files, enabling you to enhance your printing options and achieve consistent, professional-looking results.
Understanding Plot Styles in AutoCAD
Before we explore how to add plot style in AutoCAD, let’s clarify what plot styles are and why they are important.
Definition of Plot Styles
Plot styles in AutoCAD determine how objects in your drawing will appear when printed. They control various aspects such as lineweight, color, and transparency. AutoCAD offers two types of plot styles:
- Color-Dependent Plot Styles (CTB): CTB files assign properties based on the color of the objects in your drawing.
- Named Plot Styles (STB): STB files assign properties based on the names assigned to objects, regardless of their color.
Importance of Plot Styles
Plot styles serve several important purposes:
- Consistency: Maintain a consistent appearance across multiple drawings.
- Control: Fine-tune the printed output to meet your specific requirements.
- Efficiency: Apply plot styles to multiple objects simultaneously, saving time and effort.
Step-by-Step Guide to Adding Plot Styles in AutoCAD
Now, let’s walk through the process of how to add plot style in AutoCAD using a CTB file.
Step 1: Open the Options Dialog Box

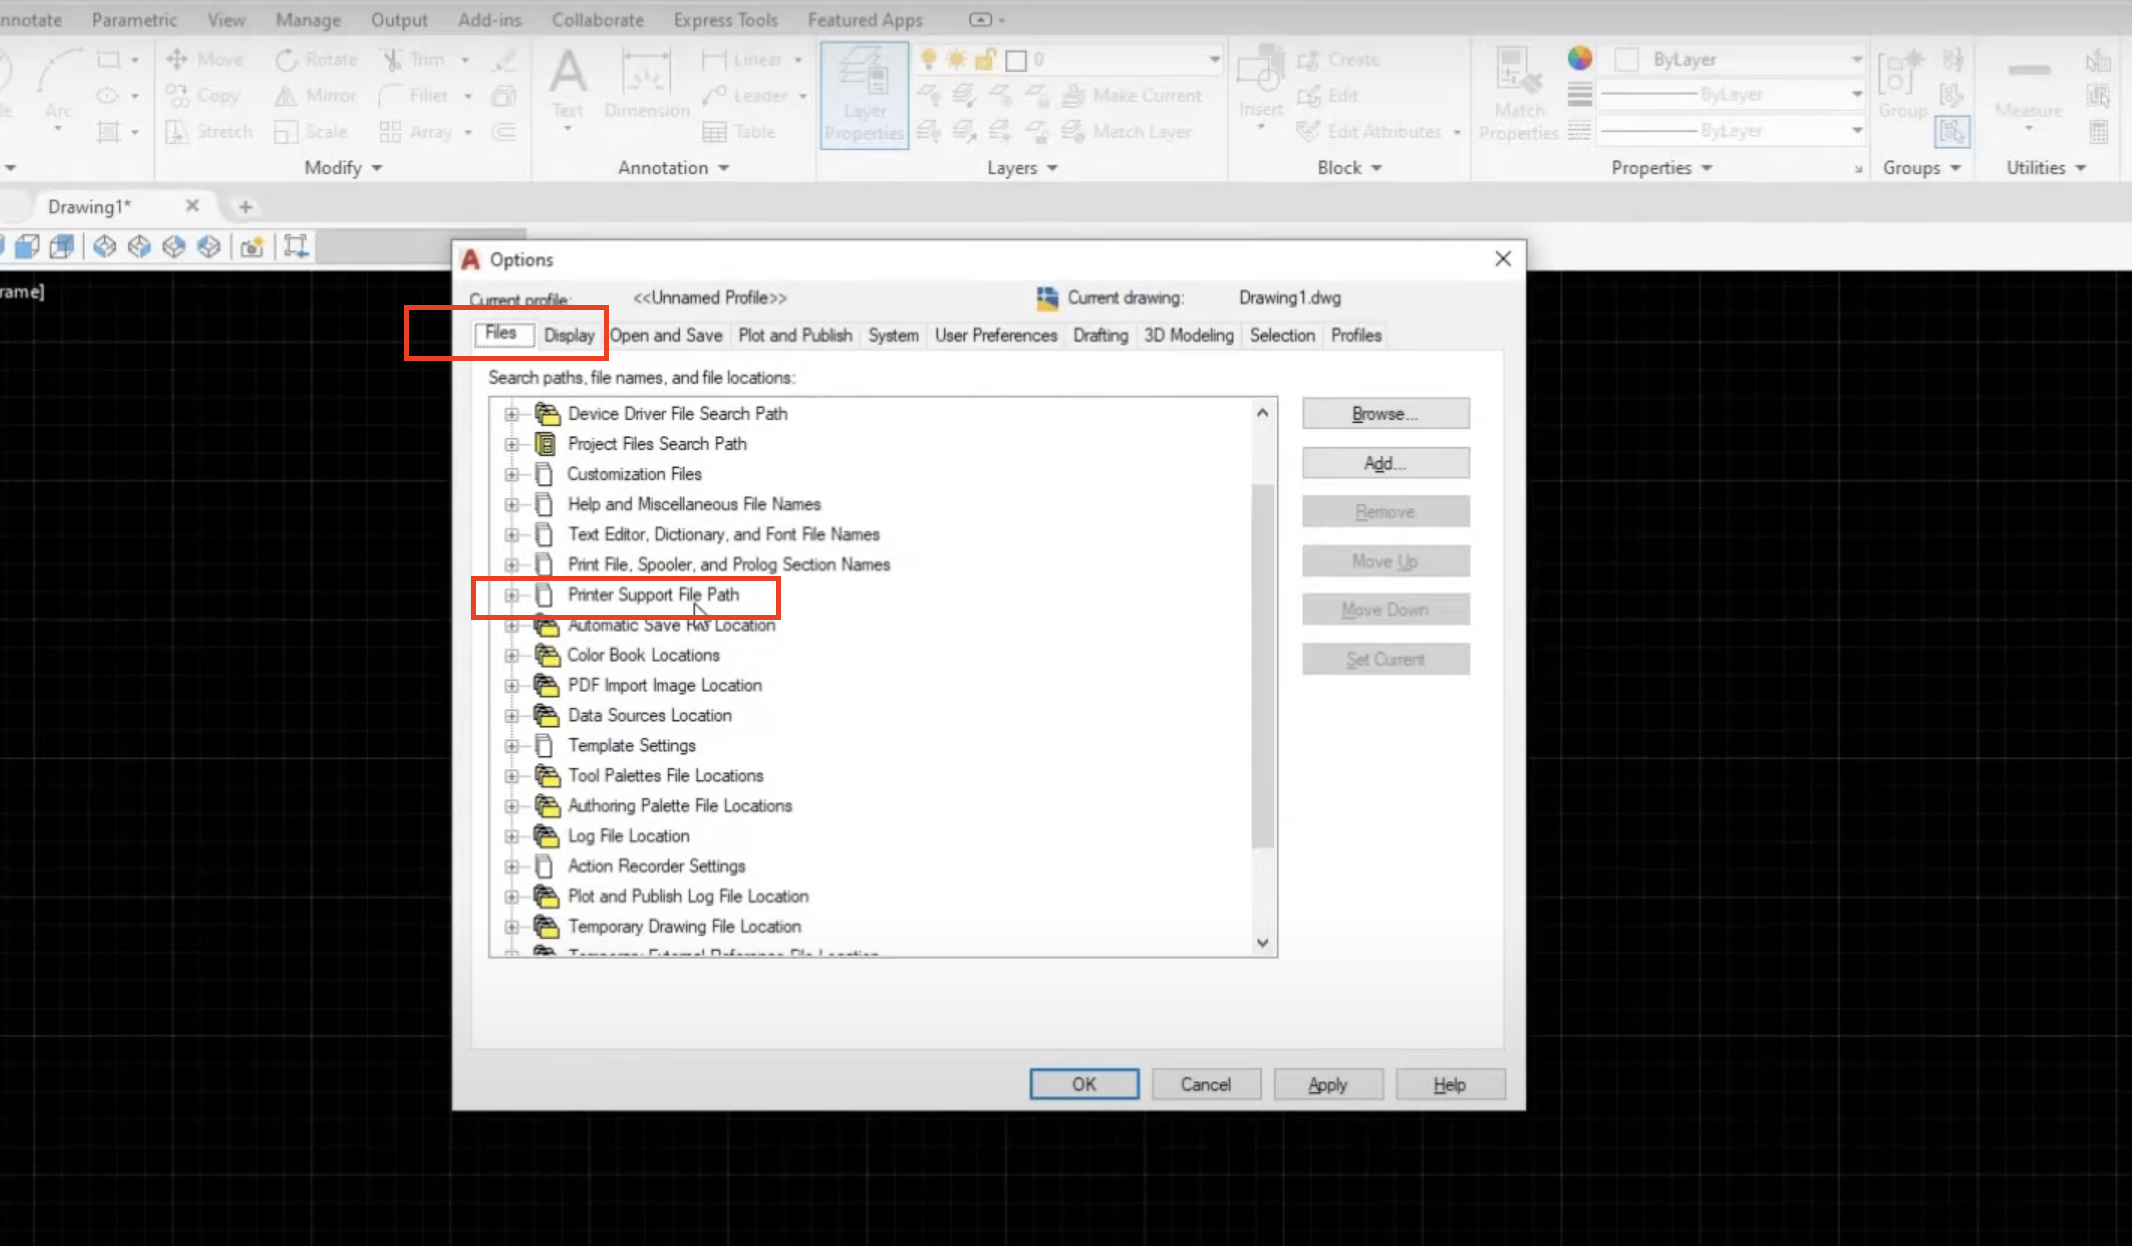
To begin, open the Options dialog box in AutoCAD. You can do this in two ways:
- Click on the AutoCAD logo and select “Options.”
- Type “ob” in the command line and press Enter.
Step 2: Navigate to the Printer Support File Path

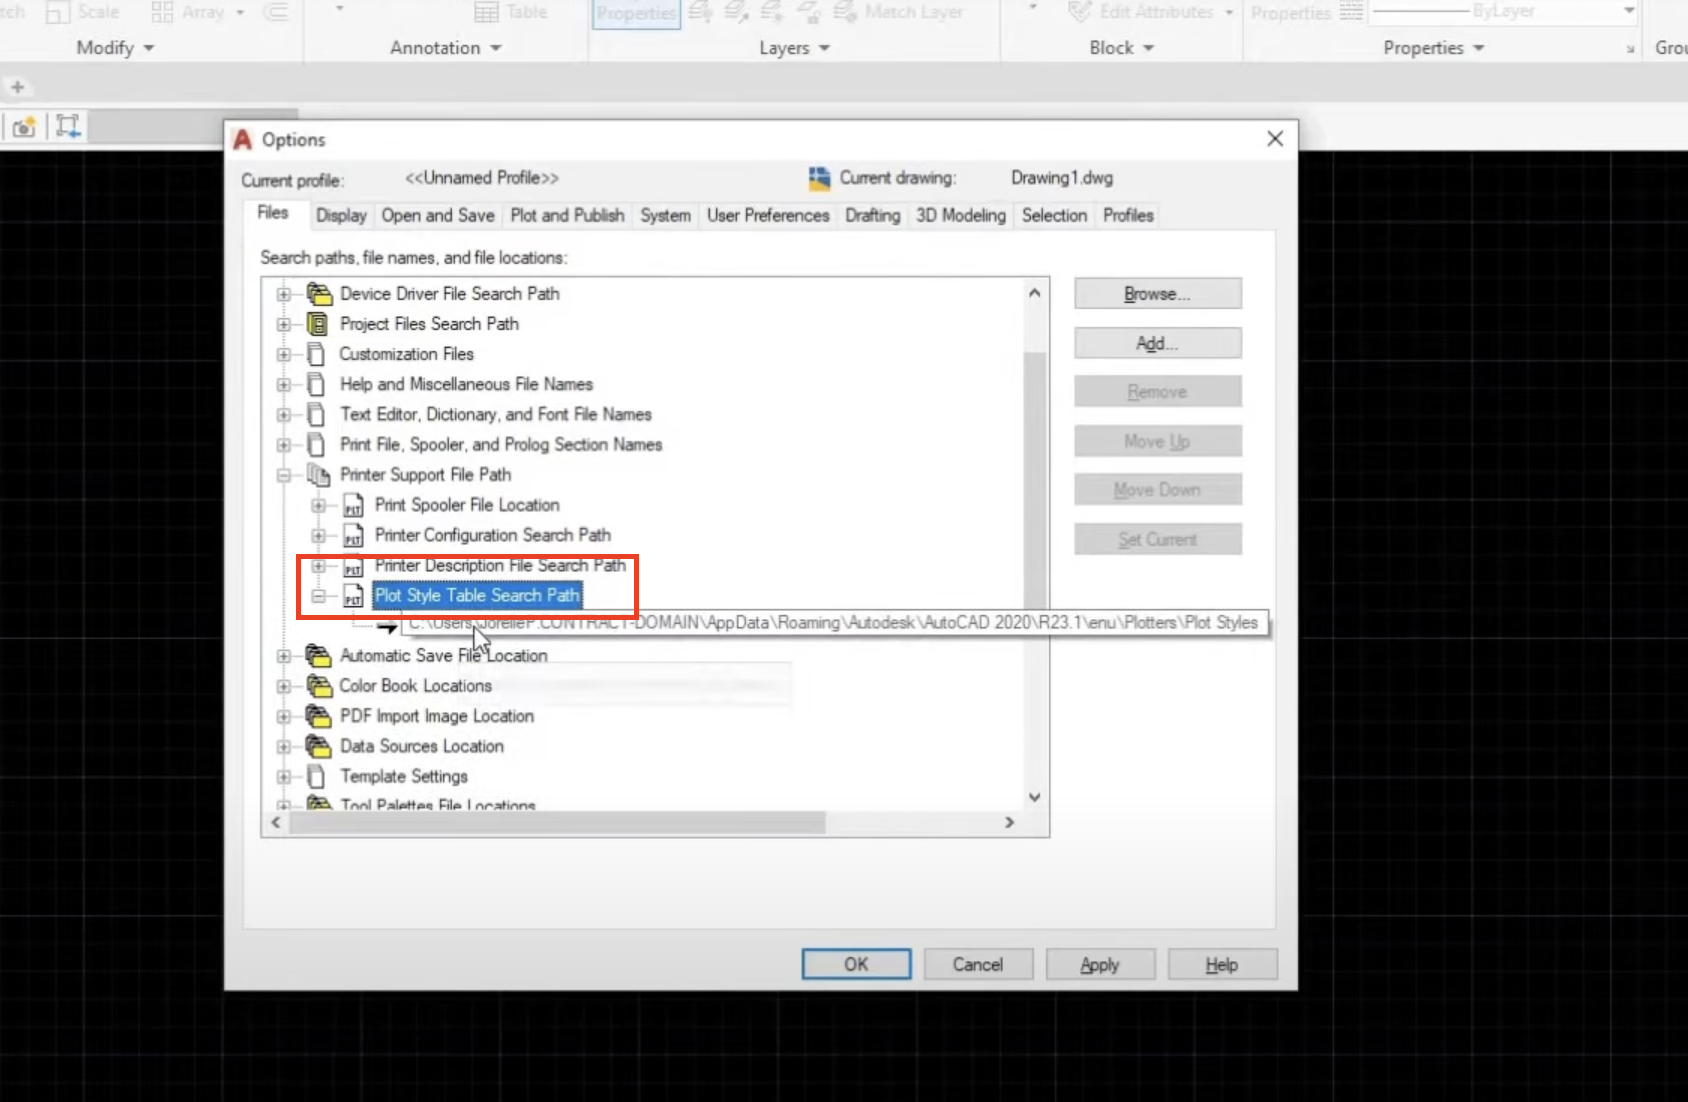
In the Options dialog box, go to the “Files” tab. Under the “Printer Support File Path” section, locate the “Plot Style Table Search Path.”
Step 3: Copy the File Path

Double-click on the file path to open it. Press Ctrl+C to copy the location.
Step 4: Navigate to the File Path in File Explorer

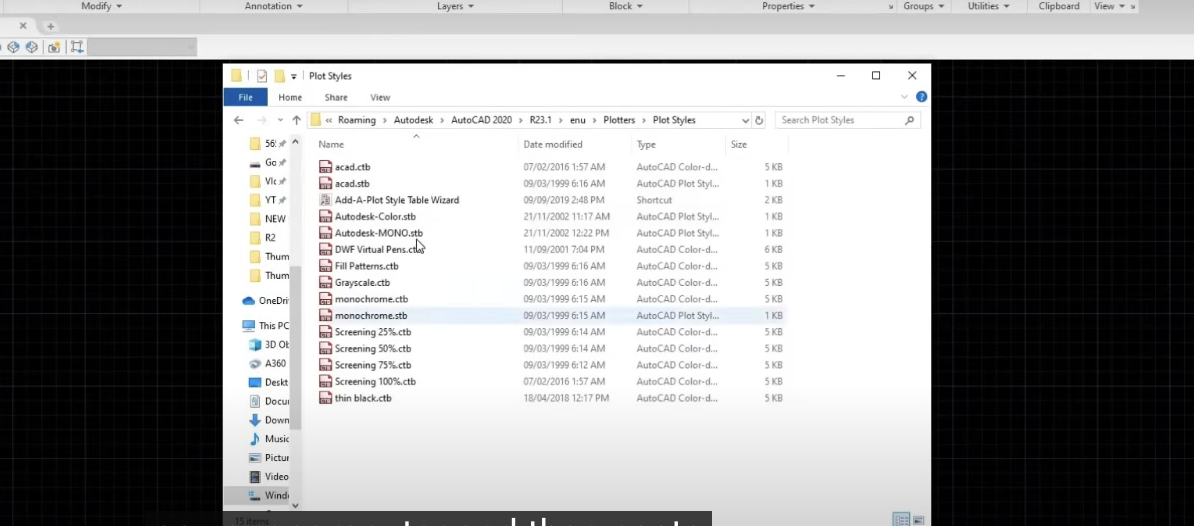
Open File Explorer on your computer and paste the copied file path into the address bar. Press Enter to navigate to the location.
Step 5: Add the CTB File

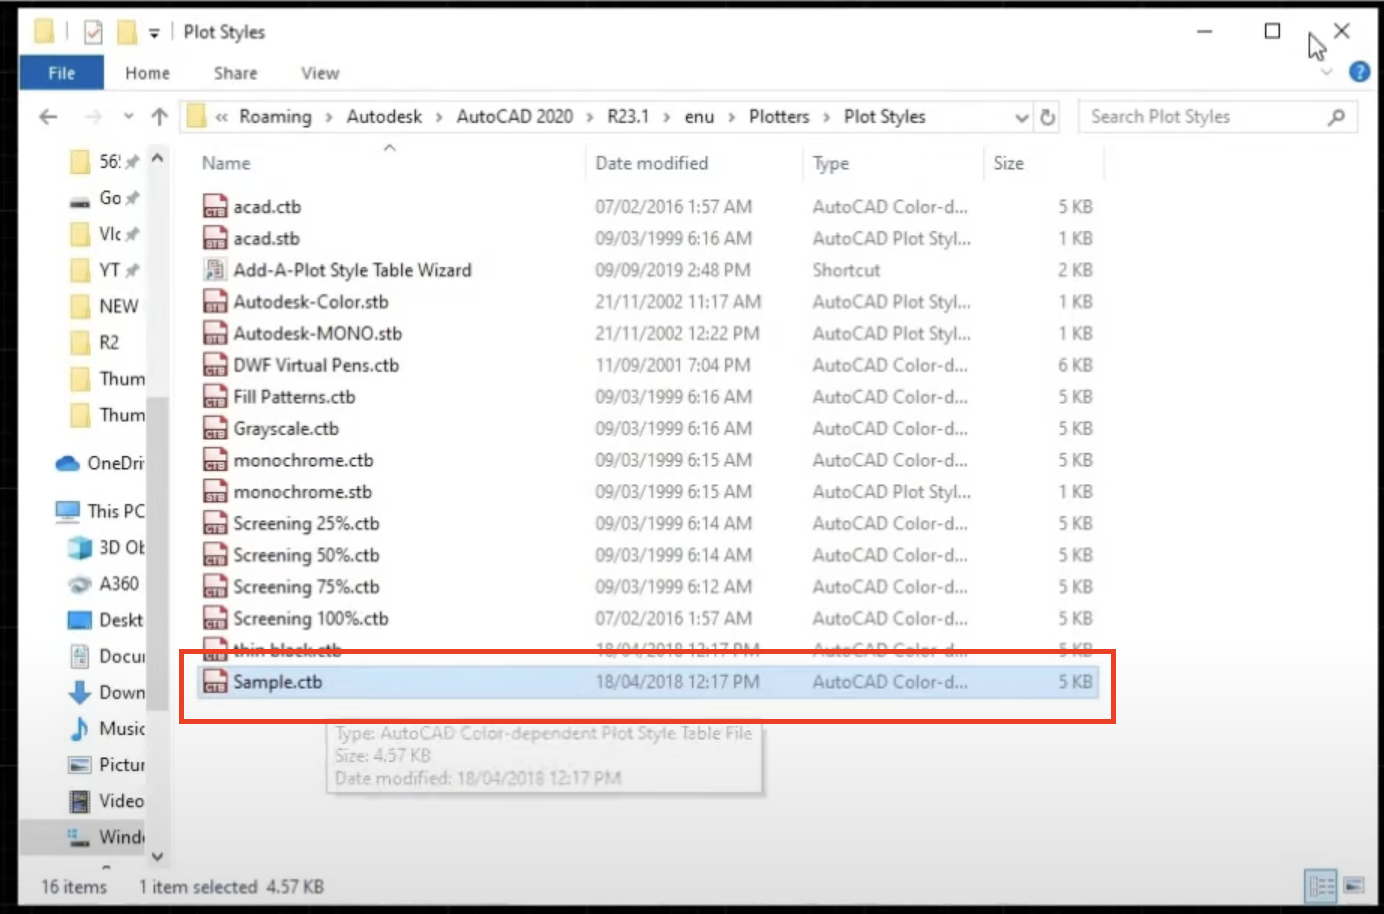
In the file path location, add your desired CTB file. For example, let’s add a sample CTB file named “sample.ctb”.
Video Tutorial: How to Add Plot Style in AutoCAD
For a visual demonstration of how to add plot style in AutoCAD, you can watch the following YouTube video:
Accessing and Applying Plot Styles
After learning how to add plot style in AutoCAD, you can easily access and apply it when printing your drawings.
Accessing Plot Styles in the Plot Dialog Box
To access the plot styles, open the Plot dialog box in AutoCAD. In the “Plot style table” dropdown menu, you should see the newly added CTB file (e.g., “sample.ctb”). Please select it from the list.
Assigning Plot Styles to Layers
To apply plot styles to specific layers, open the Layer Properties Manager by typing “la” in the command line and pressing Enter. In the Layer Properties Manager, select the desired layer and choose the corresponding plot style from the “Plot Style” column.
Applying Plot Styles to Individual Objects
You can also assign plot styles directly to individual objects. Select the object, right-click, and choose “Properties.” In the Properties palette, locate the “Plot Style” property and select the desired plot style.
Conclusion
Learning how to add plot style in AutoCAD using CTB files is a simple yet effective way to enhance your printing options and create professional-looking drawings. By following the step-by-step guide outlined in this article, you can easily add plot style CTB files and apply them to layers or individual objects. Experiment with different plot styles to achieve the desired output for your drawings and elevate your AutoCAD projects to new heights.


